

Power
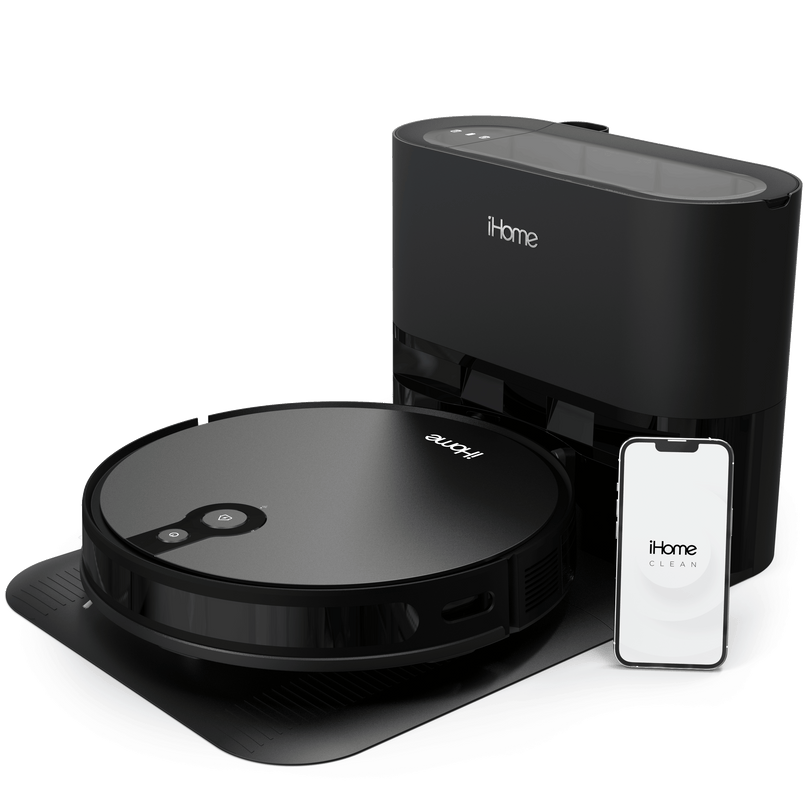
The light on the charging base will illuminate green indicating power.
1. Turn "ON" the robot by pressing and HOLDING the POWER button for 3 to 5 seconds.
2. Once powered "ON," place the robot 3 to 5 feet in front of the base. Press and release the HOME button to send the robot to Auto-Charge. The Home button will flash green when charging and remain lit solid green when fully charged.
3. If the battery is depleted, you may manually dock the robot on the charging base. The charging plates underneath the robot must align with the charging ports on the base for proper charging. *Proper alignment is usually achieved when leaving about 1 inch of space between the base and the robot.
The battery life can last up to 120 minutes on ECONOMY mode when used on bare floors. However battery life will deplete faster if the robot is used on high power modes or on flooring that generates lots of friction such as carpeting.
The display flashing RED is an indication of a SYSTEM ERROR. Open the "iHome Clean" app > tap on the iHome AUTOVAC Nova S2 and arrive on the home screen. Tap on the "Device Notifications" icon located at the top right of the screen (looks like a bell). The error message will be listed.
Most system errors are maintenance related. Please select the videos tab to view instructional maintenance videos to keep your AUTOVAC functioning at an optimal level.
Yes. The charging base needs to be connected in order to guide the robot back for charging.
Network & App Setup
Coming Soon
Watch the video tutorial to learn how to setup your iHome AUTOVAC Nova S2 on your iOS device.
Coming Soon
Watch the video tutorial to learn how to setup your iHome AUTOVAC Nova S2 on your Android device.
Coming Soon
Most newer routers support both frequency bands; 2.4GHz and 5.0GHz. The iHome AUTOVAC is ONLY COMPATIBLE WITH A 2.4GHz BAND FREQUENCY. This is true of most smart products, as the 2.4GHz band frequency reaches farther distances providing better stability. To make sure that you are connected to a 2.4GHz band frequency, follow the instructions below prior to attempting to connect your iHome AUTOVAC.
APPLE Devices Only
1. Tap on Settings > Tap on Wi-Fi > Tap on the connected network.
2. If you never changed the SSID (name of your network), the default will usually show the brand / model followed by the frequency. Look for 2.4, 24G, 2.4GHz or similar at the end of the network name; example: ARRIS-F649-24G. If you changed the name of your network, log into your router's IP address and check the frequency of the network you renamed.
Android Devices Only
1. Tap on Settings > Tap on Wi-Fi > Tap on the connected network.
2. Make sure that the frequency displayed is 2.4GHz. If a different frequency is shown, select another network in your Wi-Fi list and verify the frequency.
If there is a new firmware available, you will be prompted to update when opening the iHome Clean App. You may see your current firmware version by tapping on the Settings icon (gear) > Device Settings > Firmware Upgrade.
SECTION 1: Instructions for the person REQUESTING access:
1. Have the person download the iHome Clean App on their mobile device from the Apple App Store or Google Play App Store.
2. Open the iHome Clean App.
3. Create an account.
PAUSE. Have the person GIVING access initiate sharing by completing the steps below in SECTION 2. ONLY RESUME after Section 2 below has been completed.
4. Open the iHome Clean App. Success! You now have access to the shared AUTOVAC.
5. Tap on the shared AUTOVAC and begin use.
SECTION 2: Instructions for the person GIVING access:
1. Open the iHome Clean App.
2. Tap the iHome AUTOVAC that you would like to share.
3. Tap the gear icon (Settings).
4. Tap Device Settings.
5. Tap "Share Device."
6. Enter the email address associated with the User ID of the person you want to share the device with.
7. Tap the check mark.
8. Ask the requestor to resume their process in SECTION 1 (step 4).
To schedule a cleaning or multiple cleaning times:
1. Open the "iHome Clean" app.
2. Tap your iHome AUTOVAC.
3. Tap the gear icon (Settings).
4. Tap "Schedule."
5. Tap the "+" sign at the top right of the screen.
6. Enter the information:
Clean Mode: Example - Auto Clean, Edge Clean, Deep Clean
Time: Select the desired time.
Repeat: Set the cleaning frequency.
Suction Settings: Choose the desired suction power.
Water Settings: Choose the desired amount of water released (only necessary if mopping).Tap "Confirm."
Your schedule is now complete! You may pause a schedule by tapping the Active on / off button.
If you previously linked to Alexa and she is not responding, make sure that the robot is connected to your network. If connected, you should disable the skill and enable it again to reestablish a link.
1. Open the "Alexa" app.
2. Tap the "More" icon at the bottom right of the screen (3 horizontal lines).
3. Tap "Skills & Games" on the list.
4. Tap "Your Skills."
5. Tap "iHome Clean" Skill.
6. Tap "Disable Skill" > "Disable."
7. Tap "Enable To Use."
8. Tap "Agree and link."
9. After successfully linked, tap "Close."
10. Ask Alexa to "Start Name."
Watch the video below for a step-by-step guide on setting up areas / rooms for your iHome AUTOVAC.
Watch the video below for a step-by-step guide on setting up virtual boundaries for your iHome AUTOVAC.
Vacuum
Watch this video tutorial to learn how to clean the main brush (roller) using the provided maintenance tool.
Watch this video tutorial to learn how to clean the side brushes using the provided maintenance tool.
Watch this video tutorial to learn how to empty the dustbin, and clean/replace filters.
CLEANING MODES
Simply press the buttons on the remote control or press the icons on the iHome Clean app to activate a cleaning mode.
AUTO CLEAN - Cleans your floors until it has covered the entire surface area.
EDGE CLEAN – Finds the edges of your room and focuses its cleaning throughout the perimeter.
SPOT CLEAN – Thoroughly cleans a specific area. Use the manual navigation function on the remote control or the iHome Clean app to guide the AUTOVAC to the desired spot. Choose “Spot Clean” to thoroughly clean the area.
Manual Control – Manually guide and control your iHome AUTOVAC using the remote control or iHome Clean app.
Mapping & Navigation
Watch this video tutorial to learn how to clean and maintain the sensors on your iHome AUTOVAC.
Make sure that you have connected the iHome AUTOVAC to your home network / app. We recommend looking at FAQ "How do I connect my iHome AUTOVAC to my home network / app."
1. Once connected, open the iHome Clean App.
2. Tap on the AUTOVAC.
3. Tap on Auto Clean.
That's it! Your robot will scan the area using its LIDAR technology to develop a map. Once it completes its mapping and cleaning cycle, it will retain the map and maintain it visible in the app.
Make sure that the charging base is connected to an active outlet (light lit solid green), and that the AUTOVAC BEGINS its cleaning cycle FROM THE BASE. The AUTOVAC will detect the infrared signal emitted by the charging base to find its way back. The AUTOVAC may not take a direct path to the charging base. Please note that the infrared signal may be affected by distance, walls, or other obstructions. It may take several minutes for the AUTOVAC to find its way back to the charging base.
1. Reboot the Nova Pro.
a. Press and HOLD the Power On/Off Button for 5 to 7 seconds until the Nova Pro turns OFF.
b. After a few seconds, press and HOLD the Power On/Off Button for 5 to 7 seconds until the Nova Pro turns ON.
c. Resume using the Nova Pro.
2. Clean the infrared sensor.
a. Clean the infrared sensor strip on the front of the iHome AUTOVAC Nova Pro with a soft cloth. Watch the "How to clean the sensors" video for more information.
3. If a reboot and/or cleaning the sensor did not resolve the problem, RESET the Nova S1 to factory settings.
a. Open the "iHome Clean" app.
b. Tap on the Nova Pro icon.
c. Tap the gear icon (settings).
d. Tap "Device settings."
e. Tap "Remove/Unbind device."
f. Add your Nova again by following the app instructions.
g. Resume using the Nova Pro.
If you continue to experience issues after following the above troubleshooting steps, please contact us at:
1-877-370-4580 Monday through Friday, 9AM – 6PM EST.
Error Messages
Please find your error message below and follow resolution instructions:
Error messages will be displayed in the device notifications section. You will see the icon (looks like a bell) at the top right of the AUTOVAC home screen. Watch the related maintenance video to resolve the issue and clear the error.
Still have questions about your product?
If you can't find what you're looking for cleck below to contact us and well get back to you right away.

Subscribe to our newsletter
Promotions, new products and sales. Directly to your inbox.